Understanding PrusaSlicer: A Comprehensive Guide
The 3D printing community is vast, and the tools it employs are numerous. Among these tools is a vital component that bridges the gap between a 3D model on your computer and a tangible object made from thin layers of plastic: slicing software. Enter “PrusaSlicer” – a high-caliber slicing software that’s been gaining traction for its robustness and user-friendliness. In this article, we’ll dive into the depths of PrusaSlicer, providing insights into how to use it and why it stands out from the crowd.
The evolution of 3D printing has seen a myriad of software solutions, each trying to cater to the specific needs of its users. However, a standout tool is one that balances simplicity with complexity, ensuring novices are not overwhelmed while experts are not limited.
PrusaSlicer not only strikes this balance beautifully but also incorporates innovative features that enhance the overall 3D printing process. As we delve deeper into the intricacies of this tool, we’ll uncover the nuances that make it a preferred choice for many, from hobbyists to professional designers.
What is PrusaSlicer?
PrusaSlicer (often misspelled as “prussaslicer” or “pursa slicer“) is an application that translates 3D models into instructions for 3D printers. It was initially developed by the Prusa Research team, a well-respected name in the 3D printing industry, known for its high-quality printers.
Originating from a company that has set high standards in the realm of 3D printing, PrusaSlicer is an epitome of their dedication to simplifying the printing process. As 3D printing has evolved from being a niche hobby to an integral part of industries ranging from fashion to aerospace, the need for reliable, efficient, and user-friendly tools has skyrocketed.
PrusaSlicer not only caters to this demand but goes above and beyond by offering a suite of features designed for both newcomers and veterans in 3D printing. Its unique blend of simplicity for beginners and depth for experts ensures that it stands out in the crowded landscape of slicing software.
But what’s a slicer? Think of it as a translator. It takes the 3D model you wish to print, slices it into thin horizontal layers, and then translates those layers into machine code (G-code) which your 3D printer can understand and execute.
PrusaSlicer Download & Setup
Before delving into how to use PrusaSlicer, it’s important to know where to get it. The “prussa slicer download” is readily available on the official Prusa Research website. Since it’s open-source, it’s free to download and use. After downloading, installation is straightforward, much like any other software.
How to Use
PrusaSlicer boasts an intuitive interface, making it a popular choice among both beginners and seasoned 3D printing enthusiasts. Here’s a simple guide on “how to use prusa slicer“:
Importing the Model: After launching PrusaSlicer, you can easily drag and drop your 3D model into the application. Alternatively, use the ‘Add’ button in the top left corner to browse and import your model.
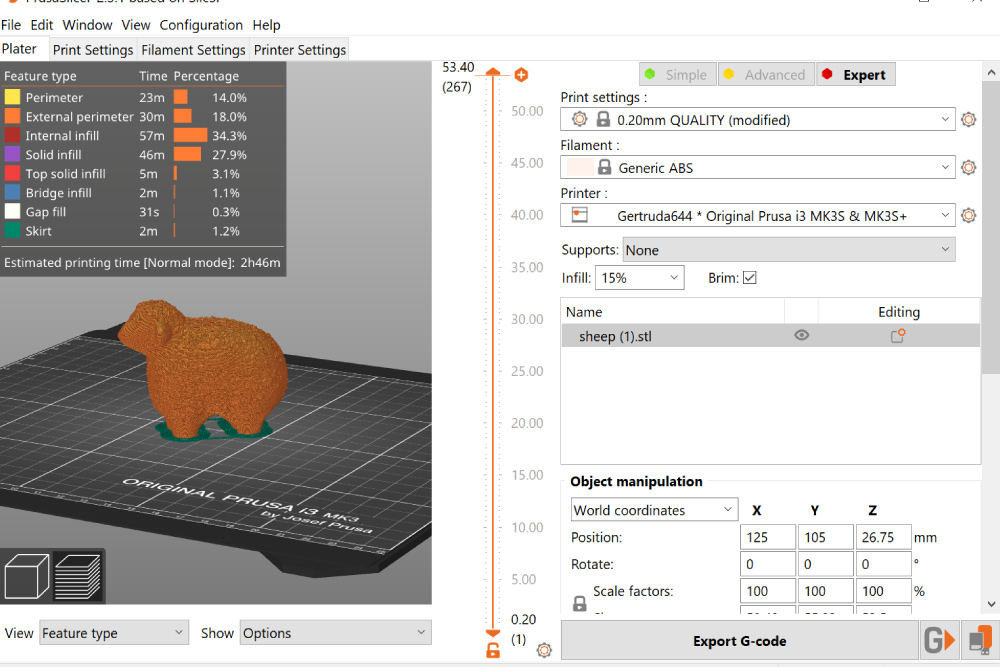
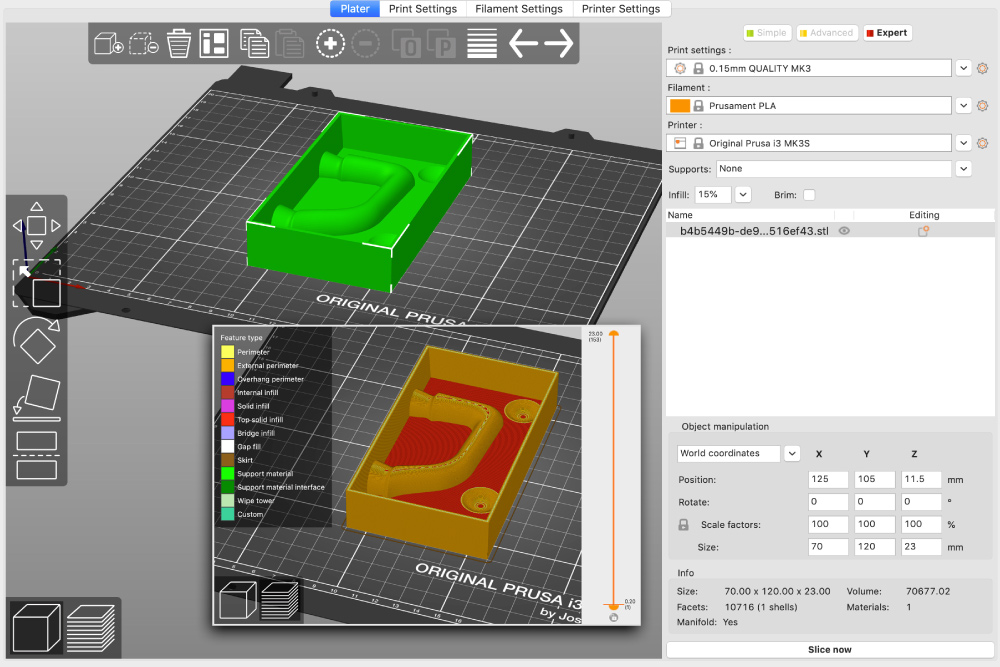
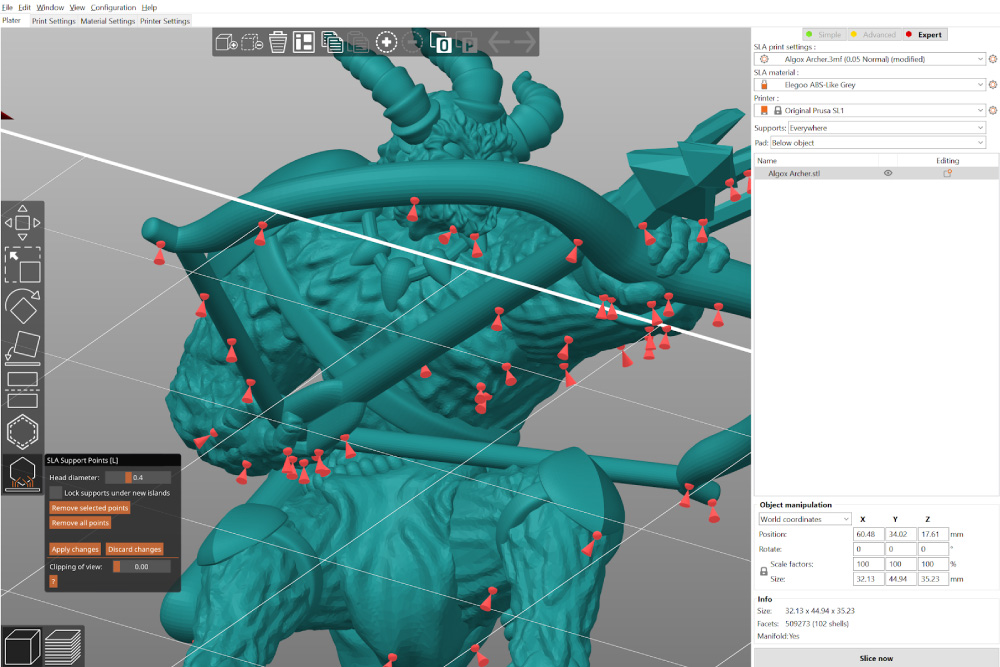
Setting the Print Parameters: The right panel offers numerous settings, from layer height, infill, supports, to print speed. For beginners, the software provides preset configurations that are optimized for different outcomes.
Slicing the Model: Once you’re satisfied with the settings, click on the ‘Slice Now’ button. PrusaSlicer will then process the model and generate the G-code. This might take a few minutes, depending on the complexity of the model.
Preview & Export: After slicing, you can preview the print layer-by-layer, giving you an idea of how the print will proceed. Once everything looks good, save the G-code to an SD card or any medium compatible with your 3D printer.
Printing: Insert the SD card into your 3D printer, select the G-code file, and let the magic begin!
Why Choose PrusaSlicer?
Now, some might ask, “With various slicing software options available, why would I choose PrusaSlicer?” Here’s the answer:
User-Friendly Interface: The clear, organized layout is conducive to users of all experience levels. Whether you’re a novice just dipping your toes into 3D printing or a veteran, PrusaSlicer is approachable and easy to navigate.
Advanced Customization: While beginners can benefit from preset configurations, advanced users have a plethora of detailed settings to fine-tune their prints.
Continuous Updates: Being open-source, PrusaSlicer enjoys constant community-driven enhancements and updates. The team at Prusa Research is also committed to refining and expanding the software’s capabilities.
Compatible with Various Printers: Although developed by Prusa Research, PrusaSlicer isn’t exclusive to Prusa printers. With a bit of configuration, it’s adaptable to a multitude of 3D printers in the market.
Conclusion
In conclusion, PrusaSlicer is a testament to how open-source projects can lead the pack in terms of quality and user experience. Whether you’re just starting your 3D printing journey or seeking to optimize your prints, PrusaSlicer might just be the tool you’ve been searching for.
Furthermore, as the 3D printing community continues to expand, the need for reliable and efficient software grows alongside it. PrusaSlicer not only meets this demand but exceeds expectations, proving that the best tools don’t always come with a hefty price tag. Its community-driven development ensures that it evolves with the times, adapting to new challenges and embracing innovations.
In a rapidly changing landscape of technology, it stands as a beacon for those who seek precision, flexibility, and a seamless printing experience. The future of 3D printing looks promising, and with tools like PrusaSlicer at the helm, we can anticipate even greater advancements in the realm of digital fabrication.