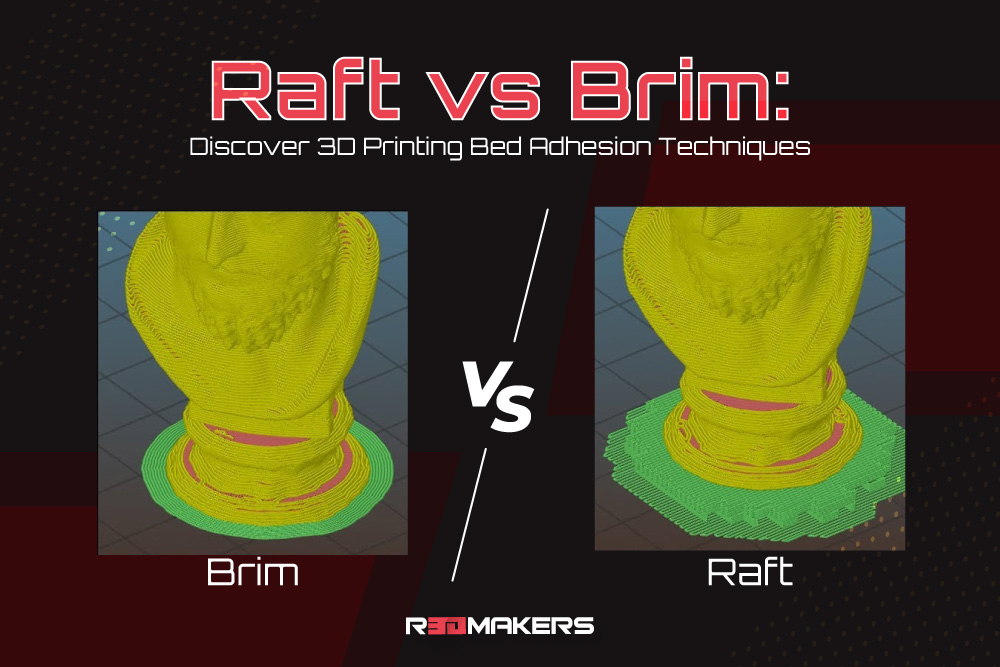
Raft vs Brim: Discover 3D Printing Bed Adhesion Techniques
3D printing offers unparalleled precision, enabling creators to bring their ideas to life in tangible forms. However, even the most seasoned 3D printing enthusiasts can find themselves perplexed by terminologies such as “raft vs brim” or “skirt vs brim vs raft”. These terms, while complex-sounding, play a pivotal role in determining the success of a print.
For those who desire a smooth 3D printing experience, understanding bed adhesion is paramount. Ensuring that your model sticks securely to the print bed throughout the printing process can make or break the final outcome. To facilitate this essential adhesion, three primary techniques come into play: raft, brim, and skirt.
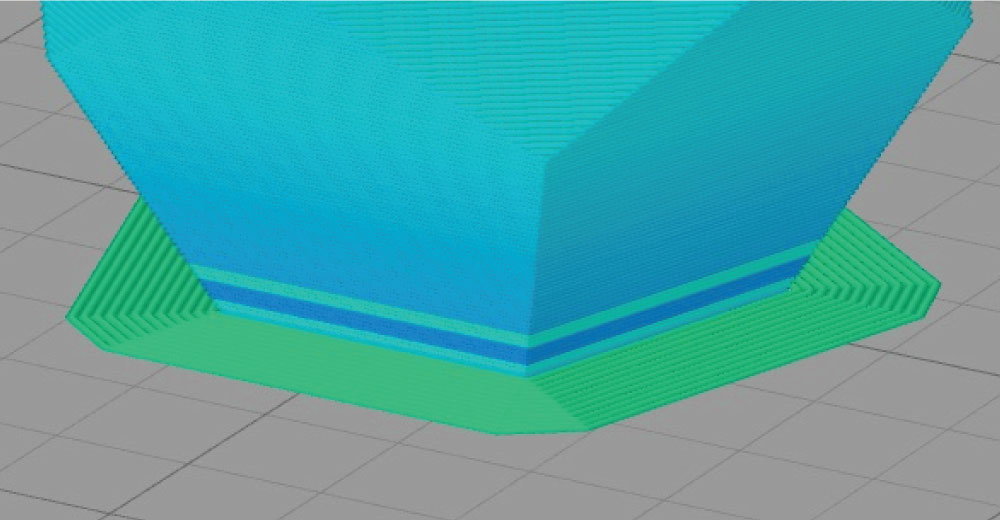
Understanding Raft in 3D Printing
When we talk about the raft, envision it as a substantial base layer of material situated directly beneath the actual object you’re printing. This temporary but thick layer acts like a foundation, ensuring that the model has consistent and reliable adhesion to the print bed. Offering a smooth and even surface, the raft becomes particularly useful when:
Comparing Raft and Brim for 3D Printing
Working with designs where the print lacks a substantial base surface, making direct adhesion tricky. Dealing with situations where the print bed might have inconsistencies or isn’t entirely leveled. However, the use of a raft is not without its cons. Beyond the obvious increase in material consumption, it also means your print time extends. Once the printing is complete, the bottom surface of your object might not have the aesthetic finish you desire, necessitating post-processing work to remove the raft and smoothen out the base.
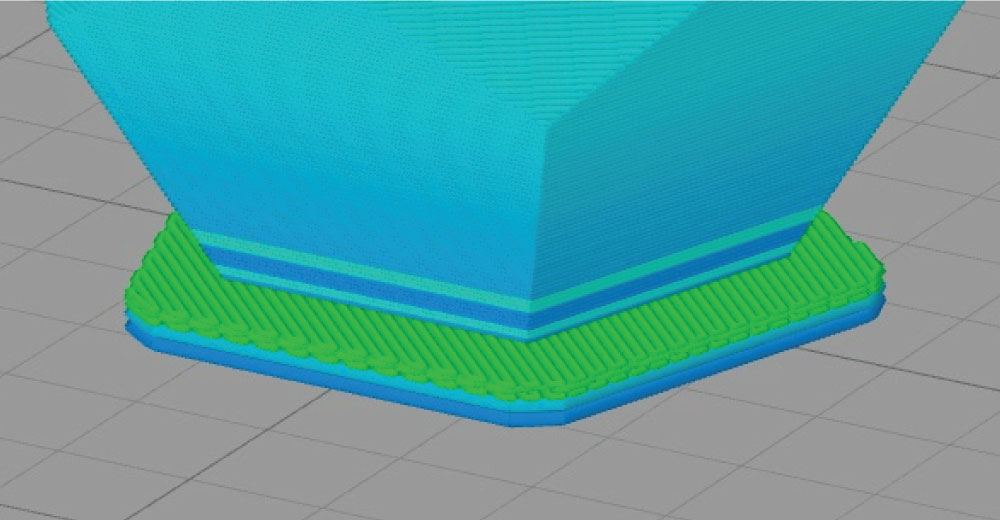
Understanding Brim in 3D Printing
The brim, in contrast to the raft, is a flatter, extended edge that goes around the base of your model, forming a link between it and the print bed. If you’re trying to find an analogy, think of the brim like the brim of a sun hat, gently encircling the main body of the hat. When to consider using a brim? The brim comes into its own by:
Offering enhanced bed adhesion, especially pivotal for those intricate models that have tiny contact points with the bed. Serving as a protective barrier, drastically reducing the chances of those dreaded warping issues. Being a more material-efficient option compared to the raft, ensuring less wastage. While the brim offers these advantages, it too, like the raft, can require some diligent post-processing. Removing the brim without damaging the print is an art in itself, and achieving a seamless base might need additional finishing touches.
Understanding Skirt in 3D Printing
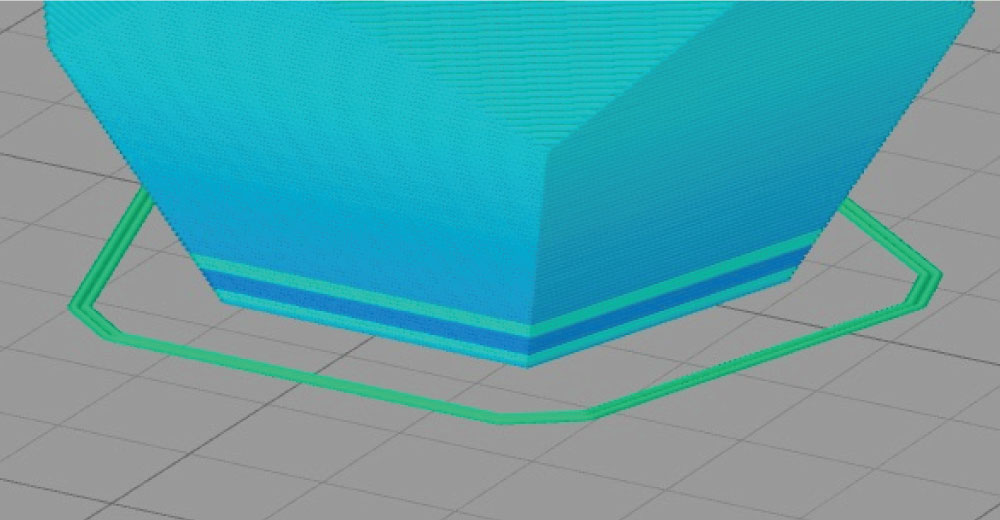
The skirt holds a unique position among these three. It doesn’t claim to improve bed adhesion, nor does it form a part of the final print. Instead, it gracefully traces a boundary around the object without making any contact. But why even consider using a skirt? The reasons are simple yet impactful:
It acts as a warm-up lap for the extruder, ensuring that by the time the actual printing begins, the filament flow is steady and consistent. The skirt serves as an early warning system, alerting the user to any potential issues. By observing the skirt’s formation, one can detect leveling problems or adhesion inconsistencies before they jeopardize the main print. Additionally, for those looking to ensure a cleaner start to their print, the skirt helps in reducing any potential oozing from the extruder.
Skirt, Brim, and Raft: A Comparison
When comparing “skirt vs brim” and “brim vs raft”, it’s essential to look at their core functionalities:
The skirt, acting like a sentinel, primes the extruder, preps the bed, and offers insights into potential printing issues. The brim, with its peripheral addition, ensures that even models with the most delicate footprints remain adhered to the bed. The raft, with its foundational approach, provides solid ground, especially for those complex prints that are inherently more susceptible to warping or those with uneven contact surfaces. While the “skirt vs brim vs raft” debate seems intricate, the choice boils down to the specific requirements of your model, the material in use, and the characteristics of your 3D printer.
Conclusion
Navigating the world of 3D printing raft vs brim “Brim vs Raft” requires a blend of technical know-how and artistic flair. The choice between raft, brim, and skirt isn’t just a matter of preference; it’s about understanding the specific needs of your project and the challenges each material presents. Whether you’re a beginner just dipping your toes into the vast ocean of 3D printing or a seasoned pro, understanding the subtle nuances of “raft vs brim” and “skirt vs brim” can significantly influence the quality of your final print.
With knowledge comes confidence, and with practice, the art of choosing between these bed adhesion techniques will become second nature. Remember, every print is a journey, and these tools are there to ensure it’s a smooth one.
Furthermore, as technology and materials in the 3D printing domain continue to evolve, it’s crucial to stay updated and adaptable. New methods and adhesion techniques might emerge, and familiar techniques may undergo refinements. Embracing a mindset of continuous learning will enable enthusiasts and professionals alike to harness the full potential of their 3D printers.
As with many skills, mastery in 3D printing doesn’t come overnight. It’s a combination of knowledge, hands on experience, and the wisdom to select the right tool for the task. In this dynamic world, every print not only culminates in a tangible product but also contributes to the ever-growing repository of your expertise.