An Extensive Guide to Tinkercad 3D Printing
Tinkercad 3D Printing: An In-Depth Guide
The world of 3D printing has never been more accessible, thanks to platforms like Tinkercad. Ideal for both beginners and experienced designers, Tinkercad 3D printing is becoming a go-to method for prototyping, creative projects and educational purposes. Its simplicity, combined with its robust set of features, makes it a favored choice for many.
If you’ve ever wondered how to 3D print from Tinkercad, this guide will take you through the process, ensuring you can transfer your designs from Tinkercad to a 3D printer effortlessly. This capability fosters an environment of innovation and limitless possibilities. The ease with which users can visualize, create and refine their models sets Tinkercad apart.
Getting Started with Tinkercad 3D Printing
For those unfamiliar, Tinkercad is an online design platform that offers an intuitive, user-friendly interface. It simplifies the complex processes of CAD (Computer-Aided Design), making it easier for users to dive into the world of tinker 3D printing. Given its cloud-based nature, users can design, modify, and share their creations from anywhere with internet access.
Furthermore, the platform’s collaborative capabilities allow users to share and co-edit designs, making it perfect for team projects. With an array of online tutorials and community support, Tinkercad ensures that every user, regardless of their experience level, can bring their visions to life.
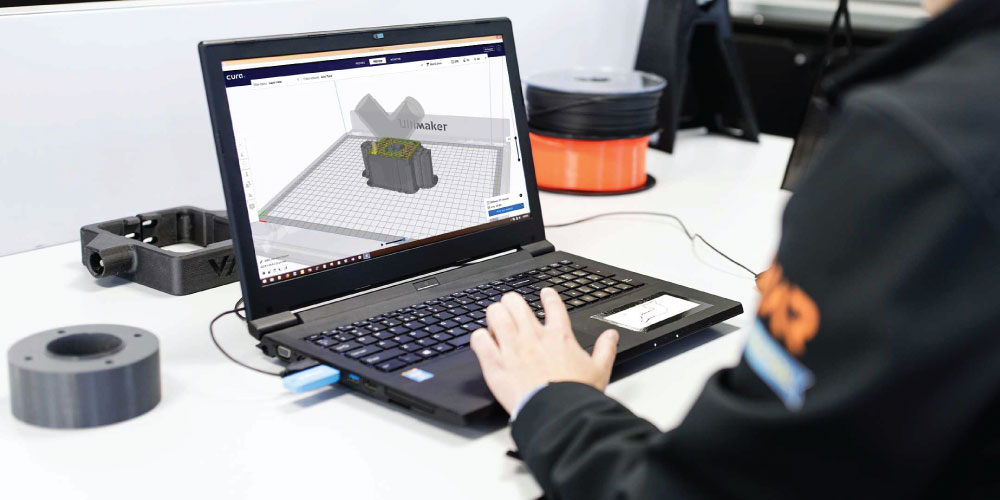
How to 3D Print Using Tinkercad: Step-by-Step Guide
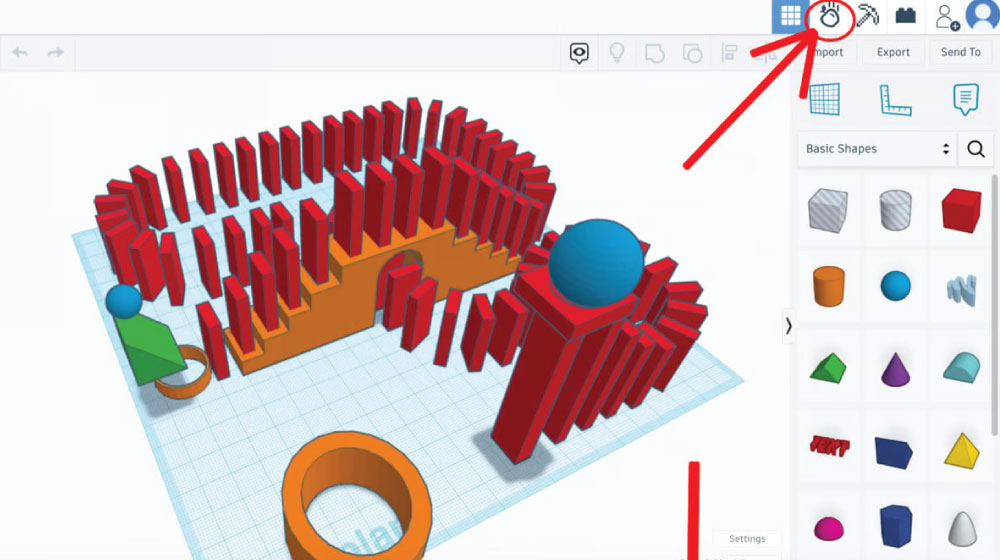
Design Creation: Start by logging into Tinkercad and creating your design. The platform provides various shapes and tools that can be combined, adjusted or manipulated to form your desired 3D model. Its drag-and-drop interface ensures that even those new to design can quickly grasp its functionalities. With an array of pre-set designs and community-contributed models, you can either start from scratch or modify existing designs to suit your needs.
Exporting Your Design: Once satisfied with your creation, the next step on how to print from Tinkercad is to export your design. Click on the ‘Export’ button in the top right corner of the interface. This will present multiple file formats. For 3D printing, the most common format is .STL, so ensure you select that. It’s essential to remember the scale of your design when exporting to ensure it fits the print bed of your 3D printer. Being able to export in different formats also means your design can be utilized across various platforms and applications.
Slicing Software: After downloading the .STL file, you need slicing software to convert the design into layers that the 3D printer can understand. This software will also allow you to adjust printing parameters like infill, layer height, and print speed. Familiarizing yourself with slicing software can significantly impact the final print’s quality. It’s where you can adjust support structures, ensuring parts of the model that overhang have something to rest upon during printing.
Printing the Design: Now that your design is sliced and ready, transfer it to your 3D printer, either via SD card, USB, or directly if your printer allows. Ensure the printer is calibrated, loaded with the appropriate filament, and then start the printing process. Always monitor the first few layers of the print to ensure it adheres well to the print bed. Ensuring your printer’s nozzle and bed are clean can also prevent potential printing issues.
Improving Your Tinkercad 3D Printing Experience
Learning how to 3D print from Tinkercad is just the beginning. The platforms referenced provide numerous tips to enhance your Tinkercad 3D printer experience:
Optimize Print Settings: Each 3D printer model might have specific recommendations for optimal print settings. Familiarize yourself with these to ensure the best print quality. Consistent calibration and maintenance of your 3D printer also play a crucial role in ensuring reliable prints. Utilizing test prints can aid in fine-tuning these settings for your specific machine.
Consider Print Material: Different designs may require different materials based on their intended function. Whether it’s PLA, ABS, or any other type of filament, choose wisely to best suit your design’s needs. It’s also essential to recognize that different materials may have varied printing temperatures and settings. Material compatibility with your printer and the design’s purpose can influence your choice.
Post-Processing: After printing, some designs might benefit from post-processing, such as sanding or painting, to achieve a refined finish. The methods chosen can enhance the aesthetic and functional properties of the printed object. Materials like PLA can benefit from acetone smoothing, while others might be better suited for different finishing methods.
Key Takeaways on Tinkercad 3D Printing
Tinkercad 3D printing has democratized the design and manufacturing process, allowing everyone, regardless of their technical background, to bring their creations to life. Whether you’re a seasoned designer or someone just starting, understanding how to transfer your design from Tinkercad to 3D printer is a valuable skill in today’s maker-centric world.
Beyond just printing, the holistic understanding of design principles, material selection, and post-processing can significantly enhance the outcomes. Embrace the possibilities, dive deep into the world of 3D printing with Tinkercad, and let your creativity soar.