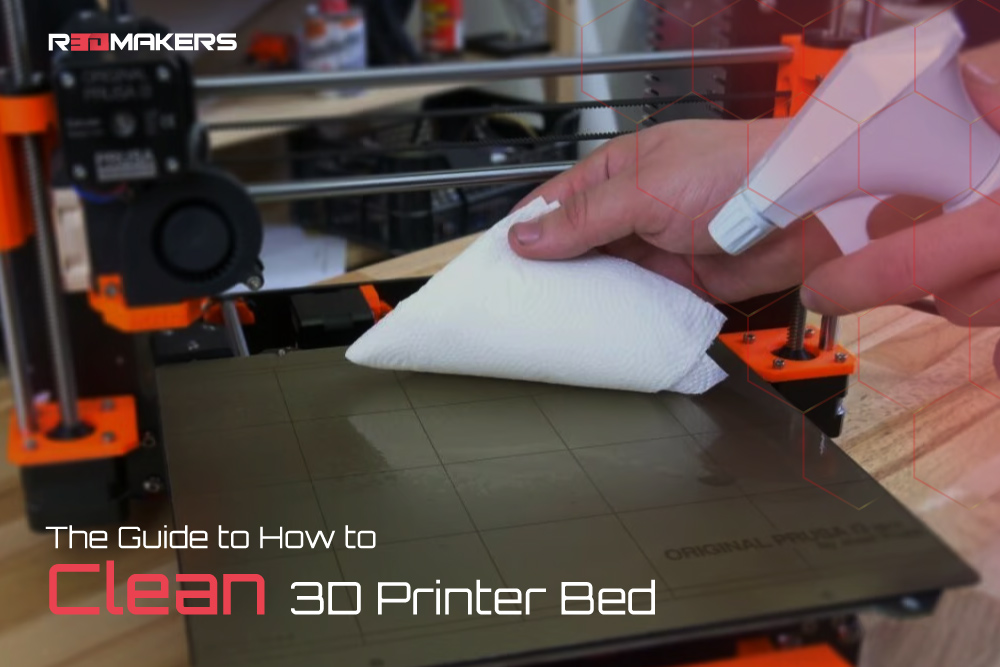
The Guide to How to Clean 3D Printer Bed
Comprehensive Guide to Cleaning Your 3D Printer Bed
3D printing has revolutionized the way we conceive and manufacture objects. With this growing technology, comes the responsibility of proper maintenance to ensure the longevity of equipment. However, ensuring a consistent and high quality print isn’t only about the design or filament used. An integral part of the process involves maintaining the 3D printer, especially the printer bed. If you’ve ever wondered how to clean 3D printer bed, this article will guide you through the steps and best practices. Regular maintenance can enhance the printer’s performance and prevent many common printing issues.
Why Clean Your 3D Printer Bed?
Before diving into the how-tos, it’s crucial to understand the importance of a clean 3D printer bed. Over time, residue from the printing material accumulates on the bed, potentially causing issues like poor adhesion, warping, or even damaging the build plate itself. Moreover, accumulated debris can affect the print’s accuracy, leading to distortions in the final product. Regular cleaning a 3D printer bed ensures that your prints adhere well, reduces the chances of a failed print, and can also enhance the longevity of your printer.
Step-by-Step Guide to Cleaning Your 3D Printer Bed
- Safety First: Before you start the cleaning process, always ensure that the printer is turned off and unplugged. Doing so ensures that you’re safe from any electrical mishaps. This not only prevents accidental burns but also safeguards the printer’s electronics. Furthermore, working on a cooled bed reduces the risk of warping or other thermal damage.
- Wipe with Isopropyl Alcohol: For regular cleaning after each print, a simple wipe down with isopropyl alcohol (preferably 90% or higher) using a soft cloth or paper towel is sufficient. This chemical evaporates quickly and doesn’t leave behind residues. This method is effective in removing any filament residue and ensuring that the bed remains free from oils and grease. It’s also cost effective and easily available.
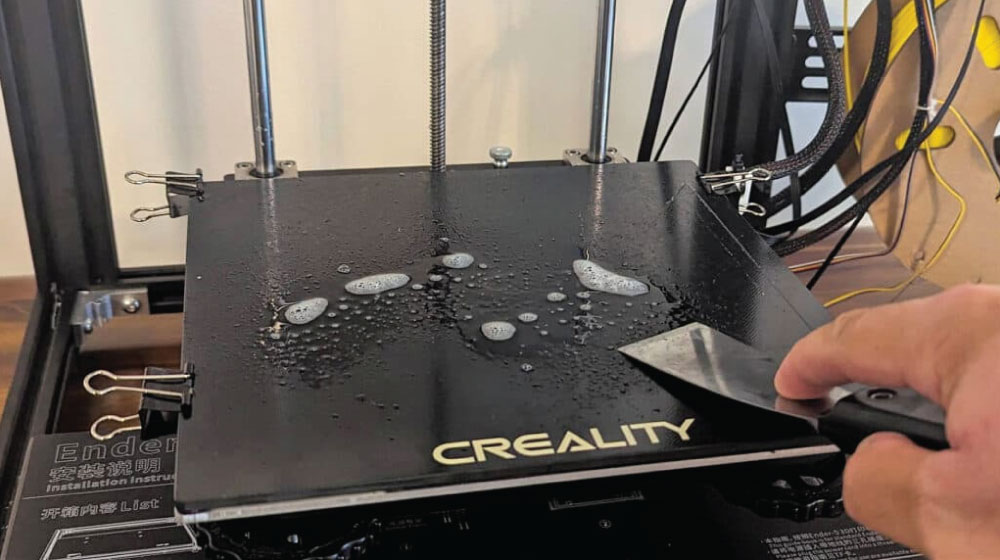
- Soap and Water Solution: If you find that the isopropyl alcohol isn’t effective, especially for more stubborn residue, using a solution of warm water and mild soap is recommended. This method mimics the cleaning of many household surfaces. Gently scrub the build plate using a soft cloth, rinse thoroughly and let it dry completely before reinserting it into the printer. Ensure no soap residue remains as it can affect print adhesion.
- Acetone for ABS Residue: For those using ABS filaments, sometimes the residue can be particularly stubborn. In such cases, acetone can be a powerful solvent. Remember to use it in a well ventilated space to prevent inhalation of fumes. However, be cautious and use it sparingly, as excessive use can degrade certain build surfaces and harm the bed’s integrity.
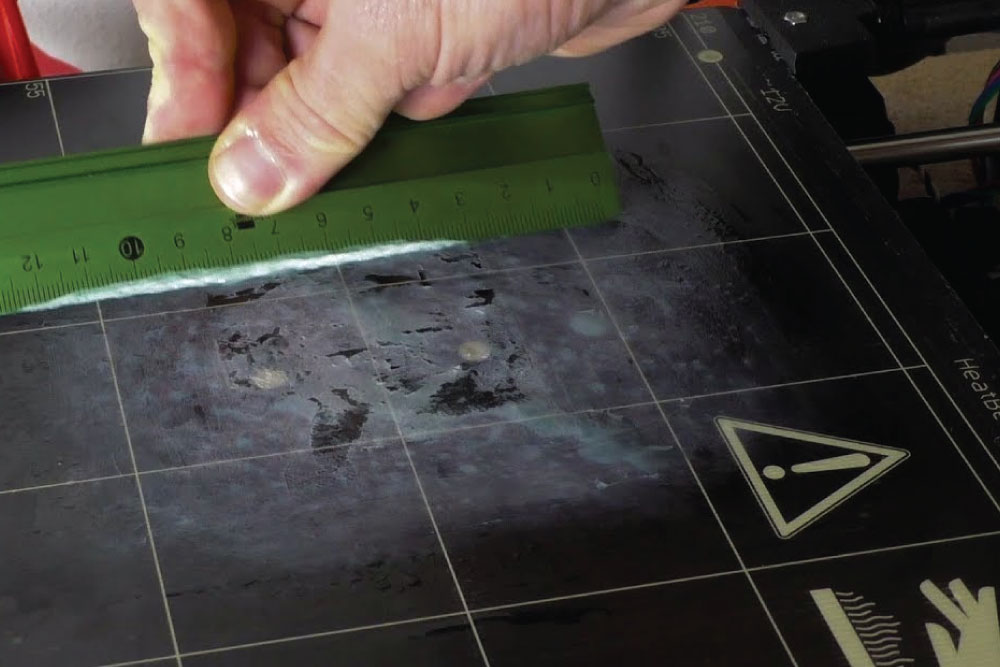
- Scraping Away Stuck Filament: For larger pieces of stuck filament or blobs, you can use a scraper or a spatula. Invest in a good quality scraper that doesn’t easily bend or break. However, exercise caution to ensure you don’t scratch or damage the build plate during the process. Always approach from a gentle angle to minimize potential damage.
- Glass Bed Maintenance: If you have a glass bed, it’s essential to be gentle during the cleaning process. Glass provides a smooth surface that can produce excellent prints when maintained properly. A mixture of water and vinegar sprayed onto the surface, followed by a wipe down with a microfiber cloth, can be an effective cleaning solution. Avoid any abrasive tools or chemicals on glass beds.
Advanced Tips for Maintaining Your 3D Printer Bed
Avoid Touching the Bed: Our hands secrete natural oils, which can transfer to the printer bed, affecting print adhesion. It’s an often overlooked aspect that can compromise print quality. Whenever possible, avoid touching the bed directly or use gloves to prevent contamination.
Use a Dedicated Cloth: Always use a separate, dedicated cloth or paper towel for cleaning your 3D printer bed. This ensures no cross contamination from other cleaning tasks. Keeping your cleaning tools exclusive to your printer means you’re always ready for a cleanup without the risk of introducing foreign contaminants.
Consistency is Key: Making the cleaning of your 3D printer bed a regular part of your post-printing routine ensures longevity and consistent print quality. Developing a habit makes it easier to remember and ensures you don’t skip this essential step. Over time, you’ll notice improved print quality and fewer issues related to bed adhesion.
Conclusion
Understanding how to clean and build plate 3D printer beds is a crucial aspect of 3D printing maintenance. This routine task, though simple, can greatly impact the success of your prints. Not only does a clean bed ensure better print quality, but it also prolongs the life of your build plate.
By following the steps outlined above and integrating them into your printing routine, you’ll be on your way to achieving perfect prints every time. Whether you’re a seasoned pro or a beginner in the 3D printing world, always remember that a clean 3D printer bed is the foundation of a successful print, setting the stage for impeccable results.