The Intricacies of 3D Printer Wire: An Essential Guide
Essential Guide to 3D Printer Wire
The 3D printing revolution has altered the face of manufacturing, prototyping, and hobbyist tinkering, creating a burgeoning community of enthusiasts and professionals alike. As the technology continues to evolve, so does the need to comprehend the minutiae of its components. Among these integral components, one which often gets sidelined but plays a pivotal role in the printer’s efficient functioning, is the 3D printer wire.
Whether you’re setting up a new printer, troubleshooting a problem, or just curious about the insides of these fantastic machines, understanding 3D printer wiring is crucial. Given its role in ensuring seamless functionality, wiring demands its share of attention. Moreover, with various printer models and specifications available, recognizing the nuances of different wire setups becomes even more vital.
Basics of 3D Printer Wiring: What You Need to Know
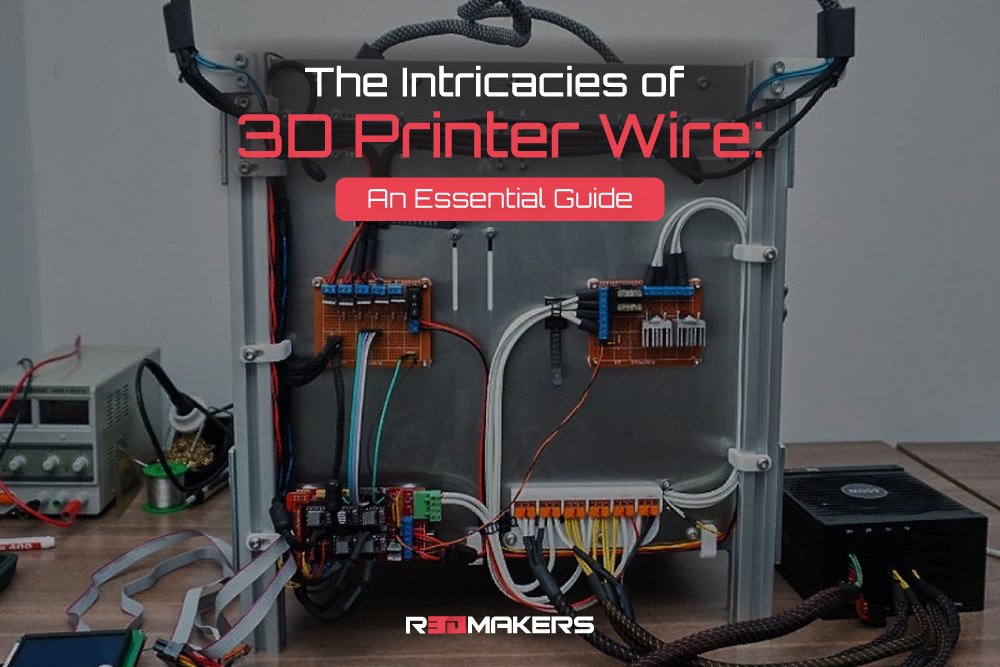
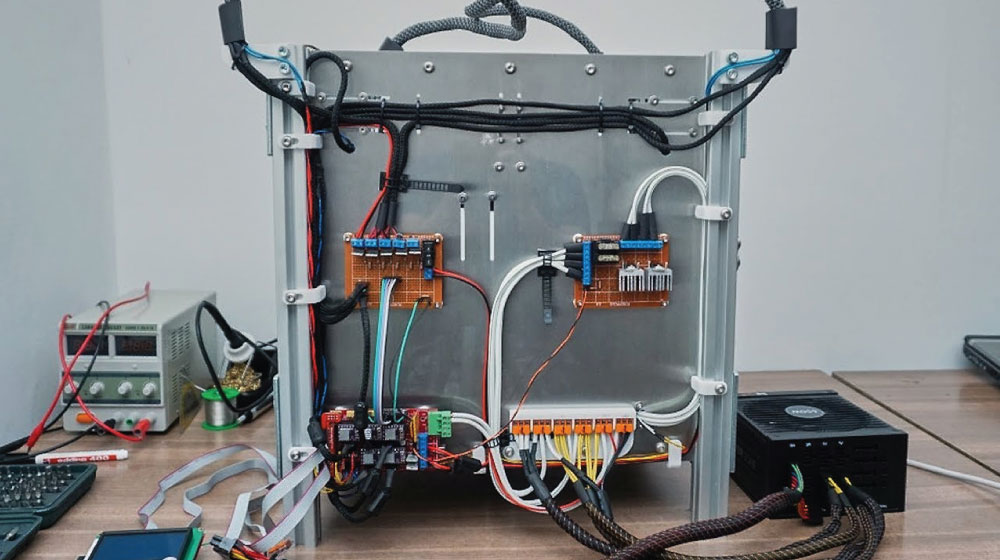
At its core, 3D printer wiring pertains to the various wires and connectors that interlink all the electronic parts of a 3Dprinter. These wires ensure that electrical signals and power are transmitted smoothly between different printer components, thereby facilitating synchronized operations. The act of wiring may seem simple, but the precision and order in which they are connected can determine the overall efficiency of the device.
The 3D printing wire is the lifeline of the printer. A well-organized and carefully selected wire can reduce the chances of electrical mishaps, improve the printer’s longevity, and increase overall performance. Yet, despite its importance, it’s common for novices to overlook the significance of quality and proper connection techniques. Moreover, when thinking about 3D print wire, one must consider both the type of wire and the connectors, as both are essential for efficient operation. Overlooking either can lead to compromised performance or, worse, potential hazards.
Arduino 3D Printer Wiring: The Core of Your Printer’s Functionality
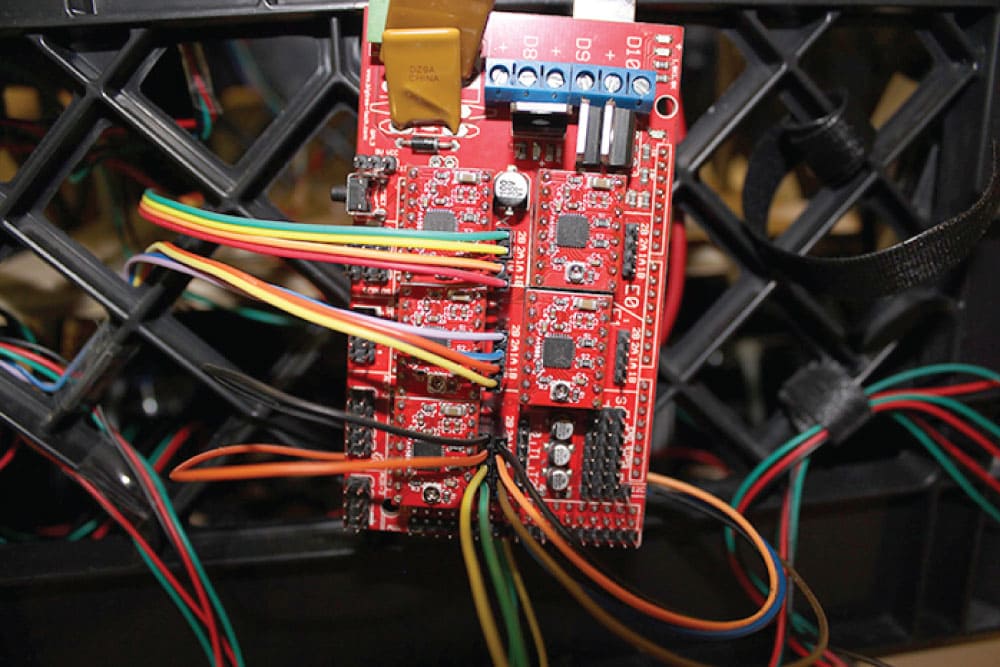
Arduino boards, often at the heart of many DIY 3D printer setups, require particular attention when it comes to wiring. Arduino 3D printer wiring is about connecting various sensors, motors and other peripherals to the board, ensuring that they communicate seamlessly. This communication is vital as the Arduino board acts as the brain of the printer, interpreting the 3D design file and instructing the printer’s parts accordingly.
Arduino’s open-source nature allows for a vast array of customizations, but this also means the user must be particularly meticulous with wiring. When setting up an Arduino for your 3D printer, always refer to the board’s schematic and ensure that each component is connected to the right pin. Additionally, given the sensitivity of these connections, using the right 3D printer wire connectors is paramount, ensuring that there are no data or power transmission losses.

Selecting the Ideal 3D Printer Wire Connectors
Connectors are as vital as the wires themselves. The 3D printer wire connectors ensure that the wires remain attached to their respective components, reducing the disconnections during printing operations. A poor connection can result in erratic printer behavior, making the selection of reliable connectors essential. When choosing connectors, consider the following:
- Compatibility: Ensure the connectors are compatible with the pins or ports they are meant to connect with. Different printer models might require varied connectors, so it’s essential to verify compatibility first.
- Durability: The connectors should withstand wear and tear, especially if you frequently disconnect and reconnect them. Over time, connectors can become loose, leading to unstable connections, so durability is paramount.
- Ease of Use: Opt for connectors that are easy to connect and disconnect without needing specialized tools. This not only facilitates easier maintenance but also ensures that users without technical backgrounds can manage basic troubleshooting.
Optimal Practices for 3D Printer Wiring
- Organize: Use cable ties or spiral wraps to bundle wires together. This not only keeps the setup tidy but also reduces the chances of wires tangling or catching onto moving parts.
- Protect: Use cable sleeves or protective casings, especially in areas where wires might rub against sharp or moving parts. This adds an extra layer of protection, ensuring the wire’s insulation doesn’t get compromised.
- Label: Especially for those new to 3D printer wiring, labeling each wire and connector can be a lifesaver during troubleshooting or upgrades.
Regular Checks: Like all components, wires and connectors can wear out. Regularly inspect for signs of wear, damage, or corrosion, and replace as necessary.
Key Insights into 3D Printer Wire
The intricate world of 3D printing is built on a foundation of myriad components working in perfect harmony. Among them, the 3D printer wire and its connectors stand out as silent but vital players. Whether you’re a hobbyist just starting out or an expert looking to upgrade, a deeper understanding of these wirings can ensure your 3D printing experience is smooth and devoid of unnecessary hiccups. Remember, the magic of 3D printing isn’t just about creating objects out of thin air; it’s also about appreciating the incredible technology that makes it all possible.